Every paperback and hardcover on Amazon KDP needs a full wrap cover: a single print-ready PDF containing the back, spine, and front of the book in one continuous file. It is also the step that trips up almost every first-time author. This guide is the exact workflow that gets approved on the first upload, with the math, the dimensions, the rejection causes, and three execution paths (Photoshop, Affinity, Canva) plus the no-design-skill shortcut.
What "full wrap" actually means
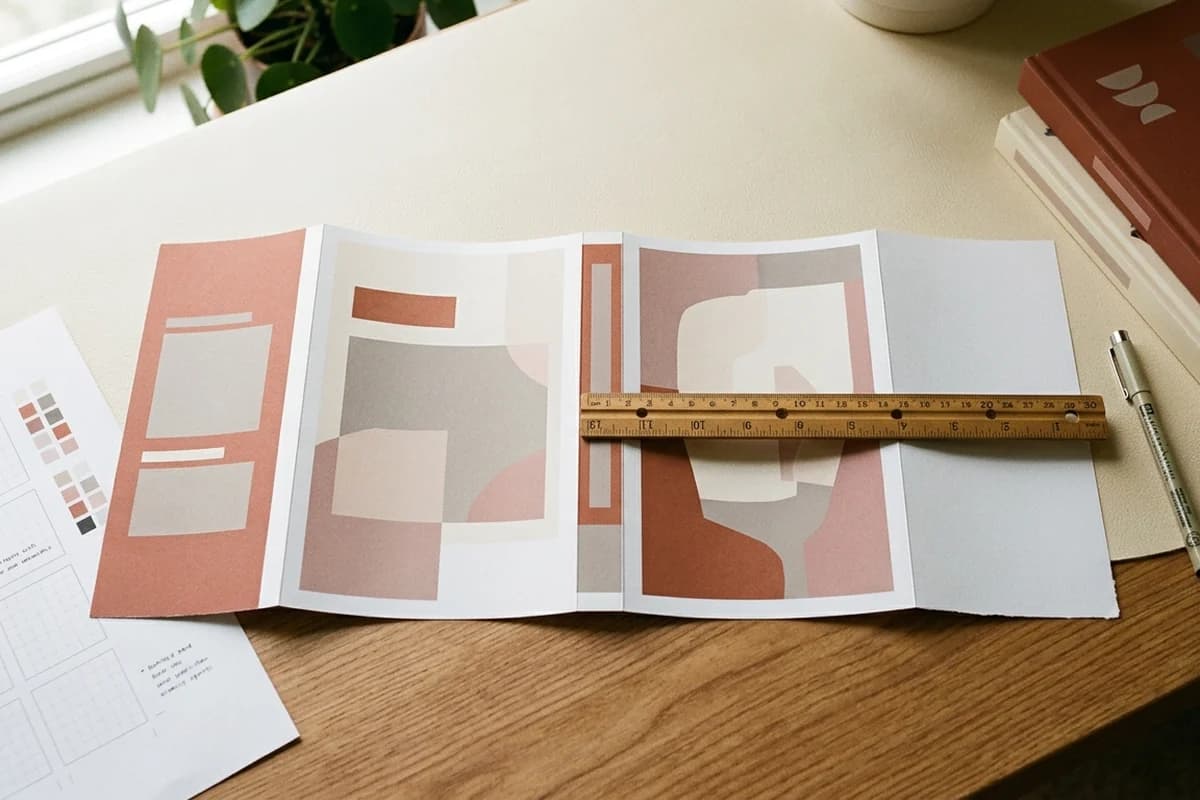
A physical book has a back, a spine, and a front. The printer wraps a single sheet of cover stock around the bound interior pages in one continuous pass. The cover file you upload to KDP must reflect that wrap layout: one PDF, three panels, read left to right when the book is laid open flat.
- Left panel: back cover - blurb, author bio, optional reviews, reserved barcode space
- Middle panel: spine - title and author (only if the book has 79 or more pages)
- Right panel: front cover - the part shoppers see on Amazon
Surrounding the entire layout is 0.125 inches of bleed on all four outer edges. Bleed is extra artwork that extends past the final trim line so the trimmer has tolerance to cut without leaving a white edge. It is the single most common source of rejections for first-time authors who do not realize their canvas needs to be larger than the finished book.
The one number that drives every other number
Your spine width determines total width, guide positions, and where every text element can safely sit. Calculate it to four decimal places using the right paper type. If you are off by even 0.01 inches, spine text drifts onto the front cover during printing and KDP's previewer often does not catch it.
Step 1: lock in your three input numbers
Before you open any design tool, decide three things and write them down. Changing any of these later means rebuilding the file from scratch.
- Trim size. The finished book's outside dimensions. Common KDP trim sizes for fiction: 5 by 8, 5.25 by 8, 5.5 by 8.5, 6 by 9. For nonfiction and workbooks: 7 by 10, 8 by 10, 8.5 by 11. Pick once.
- Page count. Exact interior page count, including blank pages, copyright page, dedication, and any backmatter. Must be even. KDP minimum is 24 pages for paperback, 75 for hardcover.
- Paper type. White, cream, premium color, or standard color. The choice changes spine width by up to 30 percent for the same page count.
Step 2: calculate your dimensions
Three formulas. Memorize them or bookmark the calculator.
Total Width = (Trim Width x 2) + Spine Width + 0.25 inches
Total Height = Trim Height + 0.25 inches
Spine Width = Page Count x Paper Thickness
The 0.25 inches of additional total width and height accounts for 0.125 inches of bleed on each outer edge. Spine width is the variable that depends on your paper choice:
- White paper: 0.002252 inches per page
- Cream paper: 0.0025 inches per page
- Premium color: 0.002252 inches per page
- Standard color: 0.002347 inches per page
Worked example: a 6 by 9 paperback, 240 pages, cream paper
- Spine width = 240 x 0.0025 = 0.6000 inches
- Total width = (6 x 2) + 0.6 + 0.25 = 12.85 inches
- Total height = 9 + 0.25 = 9.25 inches
Worked example: a 5 by 8 paperback, 320 pages, white paper
- Spine width = 320 x 0.002252 = 0.7206 inches
- Total width = (5 x 2) + 0.7206 + 0.25 = 10.9706 inches
- Total height = 8 + 0.25 = 8.25 inches
Worked example: an 8.5 by 11 workbook, 150 pages, standard color
- Spine width = 150 x 0.002347 = 0.3521 inches
- Total width = (8.5 x 2) + 0.3521 + 0.25 = 17.6021 inches
- Total height = 11 + 0.25 = 11.25 inches
Do not round the spine width. Use the full four decimal places. KDP's printers expect the precision and a rounded spine drifts text onto the wrong panel. For an automatic calculator that returns all three numbers from your inputs, the KDP cover size calculator is free and instant.
Step 3: set up the canvas at 300 DPI
Open your design tool and create a new document at the calculated total dimensions. The exact menu varies by tool but the settings are the same.
Photoshop
- File > New
- Width: total width in inches
- Height: total height in inches
- Resolution: 300 pixels per inch
- Color mode: RGB 8-bit (KDP converts to CMYK on its end)
- Background: white or transparent
Affinity Publisher
- File > New > Print
- Document units: inches
- Page width and height: your calculated totals
- DPI: 300
- Color format: RGB/8
- Bleed: 0 (bleed is already baked into the canvas size)
Canva Pro
- Create a design > Custom size
- Switch units to inches
- Enter total width and total height
- Canva exports at 300 DPI from custom canvases by default when you choose "PDF Print"
- Enable bleed in the export dialog later, not in canvas setup
RGB or CMYK?
Design in RGB. KDP accepts both and converts to CMYK during printing. Designing in CMYK locks you out of the brightest colors your image originally had. The only caveat: avoid 100 percent pure colors (true black, true red, true green, true blue). They shift unpredictably during CMYK conversion. Use 95 percent versions for cleaner print results.
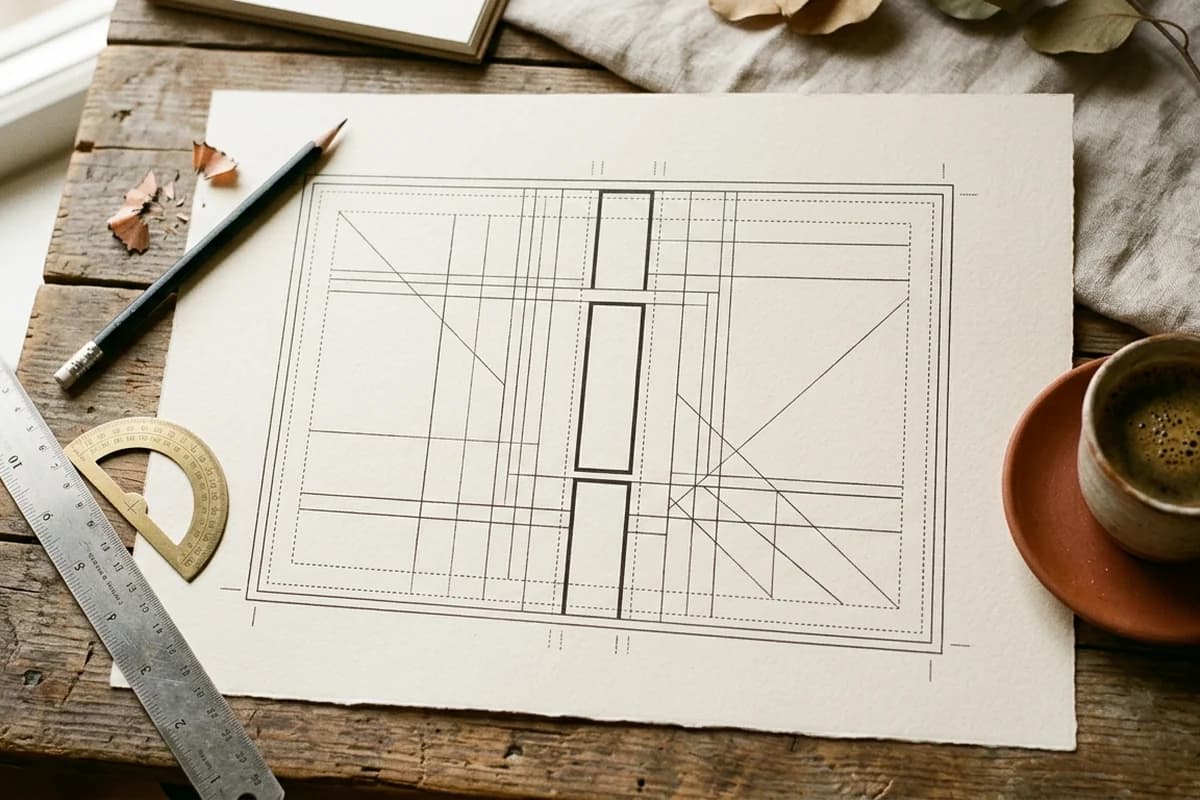
Step 4: draw the four vertical guides
These vertical guides divide your canvas into back, spine, and front panels. Measure from the left edge of the canvas:
- Guide at 0.125 inches - left edge of back cover (the trim line)
- Guide at 0.125 + Trim Width - left edge of spine
- Guide at 0.125 + Trim Width + Spine Width - right edge of spine
- Guide at Total Width minus 0.125 - right edge of front cover (the trim line)
Add two horizontal guides at 0.125 inches from the top and bottom for the upper and lower trim lines. Anything outside the trim guides will be cut off in printing. Anything inside the trim guides is part of the finished book.
Now add safe zone guides: a second set of vertical and horizontal guides 0.125 inches further inside each trim line. All text, faces, logos, and critical visuals must sit inside the safe zone. The printer's tolerance is +/- 0.0625 inches, so anything in the 0.125 inch buffer between trim and safe zone could end up too close to the edge or trimmed off.
Step 5: design the back panel
The back cover is half your conversion surface on a paperback. Most authors treat it as an afterthought and lose sales they could have won. Build the back with a strict hierarchy.
- Hook line - one sentence at the top of the back panel, 14 to 18 point, bold. The hook line is the back-cover equivalent of an Amazon book description first line. It earns the second of attention you need to keep the reader reading.
- Blurb - 200 to 300 words, 11 to 13 point body text, two or three short paragraphs. Not a synopsis. A pitch. Voice and stakes, not plot points.
- Reviews or endorsements - one or two short pull quotes if you have them. 10 to 11 point italic with attribution.
- Author bio - two or three sentences in third person, often paired with a small headshot. Optional but increases trust.
- Barcode space - clean 2 by 1.2 inch rectangle in the bottom-right corner of the back panel, approximately 0.25 inches from the bottom and right trim edges. Background only. No text. No graphics. KDP overlays its own barcode here.
Do not print your own ISBN barcode
Even if you brought your own ISBN, KDP applies its barcode automatically. Two stacked barcodes equal rejection. Always leave the corner clean.
Step 6: design the spine (if 79 or more pages)
Books under 79 pages cannot have spine text - the spine is too thin for legibility and KDP rejects covers that try. At 79 pages or more, you can include text. The font size depends on the spine width:
- 0.18 to 0.4 inches (79 to roughly 175 pages, cream): 8 to 10 point, sans-serif, title only
- 0.4 to 0.7 inches (175 to 300 pages, cream): 10 to 14 point, title plus author
- 0.7 inches and up (300+ pages): 14 to 18 point, title plus author plus optional small logo
Spine text orientation in the US and UK markets reads top to bottom - when the book is standing on a shelf, the head of the text is at the top. Rotate the text 90 degrees clockwise. Keep all spine text at least 0.0625 inches inside the spine edges. Printing tolerance is plus or minus 0.0625 inches, so anything closer can wrap onto the front or back panel.
For the full spine width formula, paper-type multipliers, and a 24-to-800 page chart, see the KDP spine width calculator guide.
Step 7: design the front cover
Three non-negotiable rules for the front:
- Title legible at 200 pixels wide. That is the size Amazon shows your cover in search results. If the title cannot be read at thumbnail size, you are paying for visibility without earning the click. Export the front panel as a JPG and shrink it to 200 pixels wide. View from three feet away. Adjust until the title reads.
- Genre cues over originality. Buyers identify the genre in 0.4 seconds before reading anything. Look at the top 20 covers in your category. Match the visual language. Differentiate in execution, not in composition.
- Front art continues across the spine. Do not hard-stop the artwork at the spine edge. Let it bleed through to the back. A continuous image looks more polished and forgives small printing alignment errors during binding.
Step 8: export as a print-ready PDF
The export step is where most KDP cover rejections happen. Settings that pass review every time:
- Format: Single-page PDF (not a multi-page document)
- Resolution: 300 DPI flat
- Color mode: RGB
- Fonts: All embedded or outlined (convert to outlines if your tool offers it; safer than relying on embedding)
- Transparency: Flattened
- Security: None - no password, no encryption
- File size: Under 40 MB (the KDP upload limit)
Photoshop export settings
- File > Save As > Photoshop PDF
- Preset: "PDF/X-1a:2001" or "High Quality Print"
- Compression: ZIP for graphics-heavy designs, JPEG max quality for photo-heavy
- Output: leave as RGB; do not convert to CMYK
Affinity Publisher export settings
- File > Export > PDF
- Preset: "PDF/X-3:2003" or "PDF for export"
- Include bleed: yes (Affinity will handle the bleed area you defined in setup)
- Embed fonts: full subset
Canva Pro export settings
- Share > Download > PDF Print
- Crop marks and bleed: enabled
- Color profile: RGB
- Flatten PDF: yes
Or skip steps 2 through 8 entirely
KDPEasy auto-calculates spine and bleed from your trim plus page count, lays out front, spine, and back, and exports a print-ready 300 DPI PDF in under 5 minutes. First cover is free.
Step 9: upload and verify in KDP
In the KDP paperback or hardcover dashboard, navigate to the cover step and upload your PDF. The previewer loads in 30 to 90 seconds. Three checks before you approve:
- Spine alignment. Zoom into the spine in the previewer. The text should sit cleanly between the two spine edges, not touching either. If the text is within 0.0625 inches of an edge, pull it further inside and re-upload.
- Barcode placement. The previewer overlays a placeholder barcode in the bottom-right of the back cover. It should land on a clean area. If it covers text or busy artwork, redesign the barcode rectangle.
- Front cover safe zone. Title, author name, and any faces should sit at least 0.125 inches inside every trim edge of the front panel.
Do not approve from a flawed previewer. The previewer can show issues that look fine on screen but fail in print, and it can miss issues that the real printer will catch. For any book you expect real sales from, order a physical proof copy (about 5 to 10 dollars plus shipping) before launching. The proof tells you what readers will actually receive.
Common KDP cover rejection reasons (and fixes)
- "Cover dimensions do not match book specs." Spine width calculated with the wrong paper type. Recalculate using the correct multiplier and re-upload.
- "Image resolution too low." Source artwork below 300 DPI when scaled to total cover size. Upscale through an AI image upscaler or regenerate at higher resolution.
- "Text in bleed area." Critical text inside the 0.125 inch bleed zone. Pull all text 0.125 inches inside every trim edge.
- "Spine text crosses trim." Spine text within 0.0625 inches of a spine edge. Pull spine text further inside.
- "Embedded fonts missing." Re-export with "embed all fonts" or outline all type before exporting.
- "PDF security present." Remove password or encryption. Re-export without security settings.
- "Barcode area not clear." Design elements behind the reserved barcode rectangle. Move or remove anything inside the 2 by 1.2 inch back-cover bottom-right zone.
Cover builder vs DIY workflow comparison
Two paths get you to a print-ready full wrap PDF. Choose based on your time, skill, and series ambitions.
DIY workflow (Photoshop, Affinity, Canva)
- Time: 3 to 8 hours for first cover, 1 to 2 hours with practice
- Cost: 0 to 60 dollars per month for software
- Skill required: Moderate to high. You need to handle dimensions, bleed, fonts, export settings, and design.
- Best for: Designers, authors with strong taste, anyone who plans to design only one or two covers a year
- Worst for: Speed, series consistency, anyone who has been rejected by KDP more than once
Cover builder workflow (KDPEasy and similar)
- Time: 3 to 10 minutes from input to print-ready PDF
- Cost: Free first cover with KDPEasy, then per-cover or subscription
- Skill required: Low. Type in trim size, page count, paper type. Pick a style. Download.
- Best for: Speed, series cohesion, anyone publishing more than two books a year
- Worst for: Heavily custom designs that need specific photographic compositions
Most indie authors should use a builder for the front-spine-back math and template generation, then swap in custom artwork or AI-generated imagery as the hero element. The math is mechanical. The art is creative. Automate the mechanical, control the creative.
Pre-upload checklist
Run this before you click submit:
- Spine width calculated to 4 decimal places using the correct paper type
- Total width includes 0.25 inches of bleed (0.125 inches each side)
- Total height = trim height + 0.25 inches
- Canvas at 300 DPI flat
- Title legible at 200 pixel wide thumbnail
- Spine text 0.0625 inches inside spine edges (or blank if under 79 pages)
- All text 0.125 inches inside all four trim edges (safe zone)
- 2 by 1.2 inch barcode rectangle reserved in bottom-right of back panel
- Fonts embedded or outlined
- Single PDF, under 40 MB, no security
- Front cover artwork continues across the spine and into the back (no hard color stops)
The one-screen full wrap workflow
Trim, pages, paper - that is the entire input. KDPEasy returns a print-ready full wrap PDF with the spine, bleed, safe zones, and barcode space already correct. Free first cover.
The shortcut version
If you only remember three things from this guide:
- Calculate the spine to four decimal places using the right paper multiplier. White is 0.002252, cream is 0.0025, standard color is 0.002347.
- Keep all critical text inside the safe zone. 0.125 inches inside every trim edge, 0.0625 inches inside both spine edges.
- Export as a flat 300 DPI single-page PDF with embedded fonts and no security. Under 40 MB.
Get those three right and your cover will pass KDP review on the first upload. Get the design right and it will also sell.
Related reads: the wraparound book cover design tips guide focuses on visual treatment rather than mechanics. The spine width formula and chart covers all four paper types. The hardcover vs paperback spec differences guide is essential reading if you are publishing both editions of the same book.
Related articles
Frequently asked questions
A full wrap cover is a single print-ready PDF that contains the back cover, the spine, and the front cover laid out as one continuous sheet. KDP requires this format for every paperback and hardcover so the printer can wrap a single piece of artwork around the bound interior in one pass. Ebooks use a separate single-image front-only cover.
Total width equals (trim width times 2) plus spine width plus 0.25 inches of bleed. Total height equals trim height plus 0.25 inches of bleed. For a 6 by 9 paperback with 200 white-paper pages, the file is roughly 12.51 by 9.25 inches. Use the KDPEasy KDP cover size calculator to skip the math.
Spine width equals page count multiplied by paper thickness. For white paper, 0.002252 inches per page. For cream paper, 0.0025 inches per page. For standard color paper, 0.002347 inches per page. KDP requires a 79-page minimum before you can place text on the spine.
Yes, but only with Canva Pro because you need custom canvas dimensions. Create a new design with your calculated total width and total height in inches at 300 DPI, design front, spine, and back in a single canvas, then export as PDF Print with bleed enabled. Watch for embedded font issues; some Canva fonts do not embed cleanly into print PDFs.
No. KDP automatically overlays its own EAN barcode in the bottom-right of the back cover, even if you supplied your own ISBN. Reserve a clean rectangle approximately 2 by 1.2 inches in the bottom-right of the back panel. If you place your own barcode there as well, the upload will be rejected.
Three causes account for roughly 90 percent of rejections: spine width calculated using the wrong paper type, text placed inside the 0.125 inch trim bleed zone, and PDFs that have security or unembedded fonts. Recalculate spine with full decimal precision, pull all text 0.125 inches inside every trim edge, and export as a flat 300 DPI PDF with embedded fonts and no security.
Any of them works. The constraint is dimensions and DPI, not software. Photoshop is best for raster-heavy designs with photographic imagery. Affinity Publisher is best for type-driven layouts and is cheaper than InDesign. Canva Pro is fastest for non-designers. A cover builder like KDPEasy is fastest of all because it sets dimensions, spine, and bleed automatically.
KDP requires 0.125 inches of bleed on all four outer edges. That bleed is built into the total cover dimensions, so you do not need separate bleed marks. Anything within 0.125 inches of an outer edge can be trimmed off in printing, so keep all critical text and graphics 0.125 inches inside every trim edge.
A flat 300 DPI is required for print covers. Anything lower triggers an "image resolution too low" rejection. If your source artwork is below 300 DPI when scaled to total cover size, upscale before exporting. AI-generated images often need an upscaling pass through an AI image upscaler before they hit print-ready resolution.
An ebook cover is a single front-only image, typically 1600 by 2560 pixels, exported as a JPG. A full wrap cover is a print-ready PDF that contains the back, spine, and front of a physical book in one continuous file at 300 DPI. The front of the wrap matches the ebook cover visually, but the file format and dimensions are completely different.
Manually, plan on 3 to 8 hours for a first cover (calculation, template setup, design, export, upload, fix rejection issues, re-upload). With practice, 1 to 2 hours. With a cover builder like KDPEasy that pre-computes spine, bleed, and safe zones, the same cover takes under 5 minutes from input to print-ready PDF.

Written by Danielle Okonkwo
Marketing & Growth Lead at KDPEasy
Danielle is a published author with 12+ titles on Amazon KDP and a former book blogger. She writes KDPEasy's guides drawing from hands-on publishing experience and years of testing what actually works in the KDP marketplace.
View profile